Gitea Installation Guide on Ubuntu 22.04
This guide explains the complete steps to install Gitea on Ubuntu 22.04 using PostgreSQL, Nginx, and SSL configuration.
1. System Update and Upgrade
Before installing any applications, we need to update the system’s package list to ensure all installed packages are the latest versions. Run the following command:
sudo apt update && sudo apt upgrade -y
The sudo apt update command updates the package list on the system, while sudo apt upgrade -y upgrades all installed packages to the latest versions.
2. Install PostgreSQL and Nginx
Install Nginx
Nginx is the web server we will use to proxy requests to the Gitea application running on port 3000. Install Nginx with the following command:
sudo apt install nginx -y
If you're using UFW (Uncomplicated Firewall), we need to allow HTTP (port 80) and HTTPS (port 443) traffic so that Nginx can serve web requests:
sudo ufw allow 80/tcp
sudo ufw allow 443/tcp
Install PostgreSQL
Gitea uses PostgreSQL as the database to store its data. To install PostgreSQL, we first need to add the PostgreSQL repository to our list of package sources.
Add the PostgreSQL repository:
sudo sh -c 'echo "deb https://apt.postgresql.org/pub/repos/apt $(lsb_release -cs)-pgdg main" > /etc/apt/sources.list.d/pgdg.list'
Add the PostgreSQL GPG key for security:
wget --quiet -O - https://www.postgresql.org/media/keys/ACCC4CF8.asc | sudo apt-key add -
Then, update the package list and install PostgreSQL:
sudo apt update
sudo apt-get -y install postgresql
3. PostgreSQL Configuration
Once PostgreSQL is installed, we need to create a role and database for Gitea. Log in to PostgreSQL as the postgres user:
su -c "psql" postgres
Create a role and a database for Gitea:
CREATE ROLE gitea WITH LOGIN PASSWORD 'yourpassword';
CREATE DATABASE giteadb WITH OWNER gitea TEMPLATE template0 ENCODING UTF8 LC_COLLATE 'en_US.UTF-8' LC_CTYPE 'en_US.UTF-8';
At this step, we create the gitea role with a password you specify, and create the giteadb database to be used by Gitea.
Next, we need to modify the authentication settings in PostgreSQL to allow Gitea to access the database. Edit the PostgreSQL configuration file:
sudo nano /etc/postgresql/17/main/pg_hba.conf
Add the following line under Authentication Records:
local all gitea md5
Then, restart PostgreSQL to apply the configuration changes:
sudo systemctl restart postgresql
To verify, try connecting to the giteadb database using the gitea role:
psql -U gitea -d giteadb
If successful, the system will prompt for the password you created earlier.
4. Install Gitea
Download Gitea
Now, we need to download Gitea, the Git server application we will run. You can choose the desired version from Gitea Downloads. Here, we will download the latest version (e.g., version 1.22.6):
wget https://dl.gitea.com/gitea/1.22.6/gitea-1.22.6-linux-amd64 -O gitea
Make the Gitea File Executable
After downloading Gitea, we need to give execute permissions to the file with the following command:
chmod +x gitea
Create a User for Gitea
Gitea requires a system user to run the application. We will create a new user with the following command:
adduser \
   --system \
   --shell /bin/bash \
   --gecos 'Git Version Control' \
   --group \
   --disabled-password \
   --home /home/git \
   git
Create Directories for Gitea
Now, we will create several directories needed by Gitea to store data, logs, and configuration:
mkdir -p /var/lib/gitea/{custom,data,log}
chown -R git:git /var/lib/gitea/
chmod -R 750 /var/lib/gitea/
mkdir /etc/gitea
chown root:git /etc/gitea
chmod 770 /etc/gitea
Configure the Gitea Configuration File
Create the app.ini configuration file for Gitea and set its permissions:
touch /etc/gitea/app.ini
chmod 750 /etc/gitea
chmod 640 /etc/gitea/app.ini
chown -R git:git /etc/gitea
Move the Gitea File to the Execution Directory
Move the executable Gitea file to the /usr/local/bin/ directory so it can be easily accessed by the system:
cp gitea /usr/local/bin/gitea
5. Configure Gitea with Systemd
Systemd is used to manage services in Linux. Now, we will create a service file for Gitea so it can run as a service.
Create the gitea.service file:
sudo nano /etc/systemd/system/gitea.service
Paste the following configuration into the file:
[Unit]
Description=Gitea (Git with a cup of tea)
After=syslog.target
After=network.target

Wants=postgresql.service
After=postgresql.service

[Service]
RestartSec=2s
Type=simple
User=git
Group=git
WorkingDirectory=/var/lib/gitea/
ExecStart=/usr/local/bin/gitea web --config /etc/gitea/app.ini
Restart=always
Environment=USER=git HOME=/home/git GITEA_WORK_DIR=/var/lib/gitea

[Install]
WantedBy=multi-user.target
This configuration ensures Gitea runs properly when the system boots. After that, run the following commands to reload systemd, enable, and start Gitea:
sudo systemctl daemon-reload
sudo systemctl enable gitea
sudo systemctl start gitea
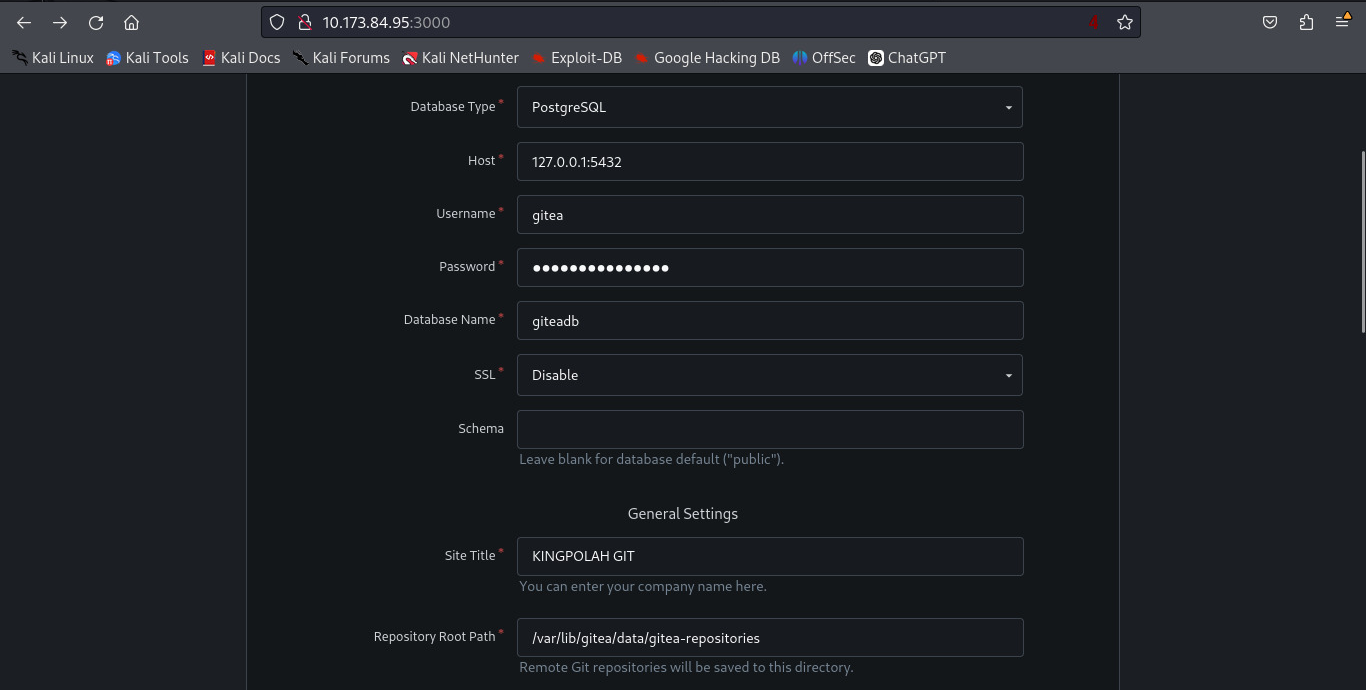
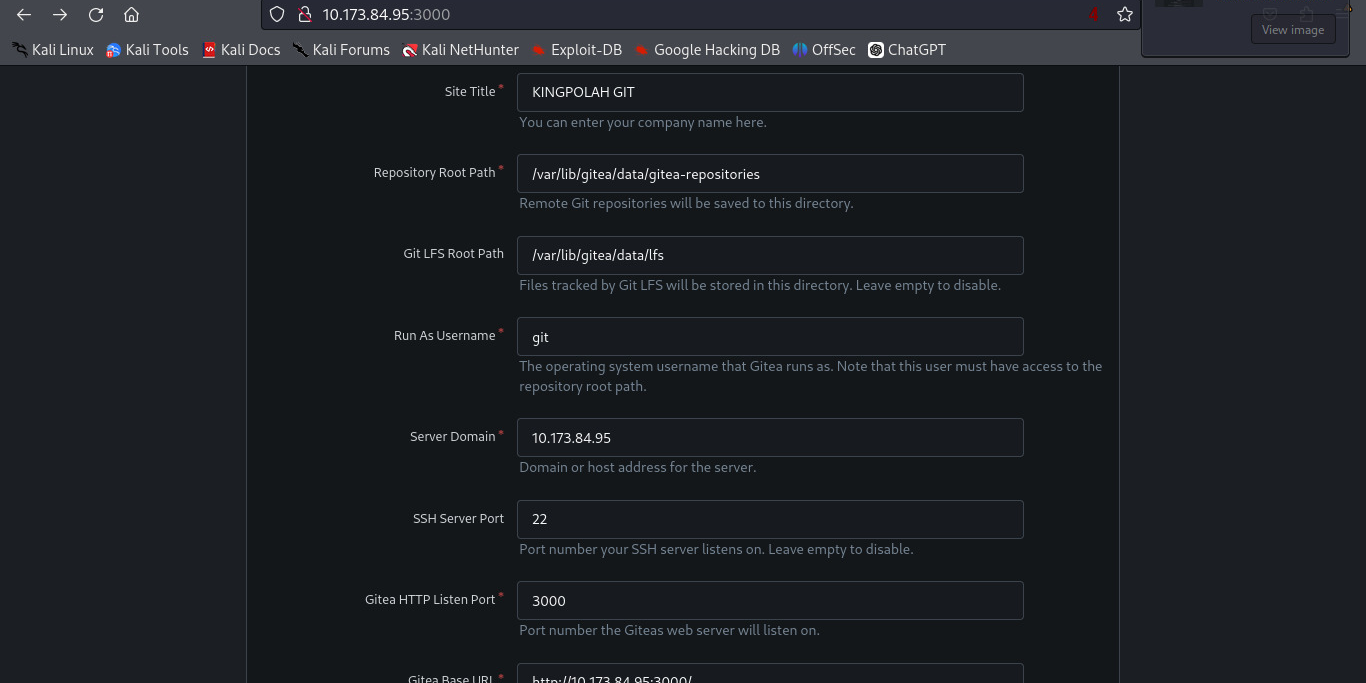
Gitea should now be accessible at http://<Server-IP>:3000. Then, set it up by entering your username, password, and the database we set up earlier.
Then, create the administrator account:
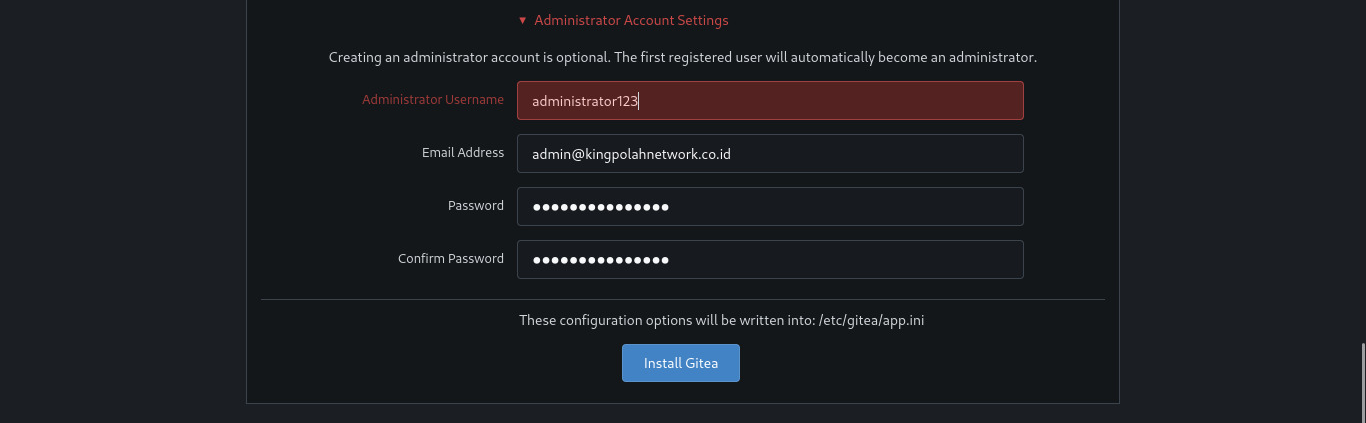
Then, click Install Gitea and wait for the process to complete.
6. Configure Nginx as a Reverse Proxy
Nginx will act as a reverse proxy to forward HTTP requests to Gitea running on port 3000. We will create a new configuration in Nginx:
sudo nano /etc/nginx/sites-available/git.example.com.conf
Add the following configuration:
server {
    listen 80;
    server_name gitea.example.com;

    location / {
        client_max_body_size 512M;
        proxy_pass http://localhost:3000;
        proxy_set_header Connection $http_connection;
        proxy_set_header Upgrade $http_upgrade;
        proxy_set_header Host $host;
        proxy_set_header X-Real-IP $remote_addr;
        proxy_set_header X-Forwarded-For $proxy_add_x_forwarded_for;
        proxy_set_header X-Forwarded-Proto $scheme;
    }
}
Create a symlink to activate this configuration:
sudo ln -s /etc/nginx/sites-available/gitea.example.com.conf /etc/nginx/sites-enabled/gitea.example.com.conf
Verify the Nginx configuration:
nginx -t

If there are no errors, restart Nginx to apply the configuration:
sudo systemctl restart nginx
Make sure your domain points to the Gitea server’s IP address.
7. Configure SSL with Certbot (Optional)
If you want to use HTTPS, you can configure SSL using Certbot:
sudo apt install certbot python3-certbot-nginx -y
sudo certbot --nginx -d gitea.example.com
8. Configure Gitea ROOT_URL
Finally, we need to configure Gitea's root URL to match our domain. Edit the Gitea configuration file (app.ini):
sudo nano /etc/gitea/app.ini
In the [server] section, change ROOT_URL to match your domain or server IP address:
[server]
SSH_DOMAIN = 10.173.84.95
DOMAIN = 10.173.84.95
HTTP_PORT = 3000
ROOT_URL = https://git-v2.local.opslinuxsec.com/
APP_DATA_PATH = /var/lib/gitea/data
DISABLE_SSH = false
Make sure ROOT_URL matches the domain you are using.
With these steps, Gitea is now installed and running on Ubuntu 22.04 with Nginx and SSL configuration (optional). If you encounter any issues, check the logs for more information. Enjoy! 😄